Despite its name, Microsoft OneNote can serve as far more than a basic note-taking application. One of these uses is as a rudimentary, but effective, wiki system. This week, our tip will go over how you can set up an internal wiki in OneNote.
Wait, What’s a Wiki, Anyways?
A wiki is a collaborative space on the web that allows any user to create content and edit what others have contributed. This content is then linked to other pages with relevant topics and keywords. Perhaps the most famous example of a wiki is Wikipedia, and WikiLeaks is known as such because it originally utilized a wiki approach.
Of course, when compared to an application that was actually intended to create a wiki, OneNote is clearly the inferior option - but its features make it a passable substitute, and an excellent introduction to the wiki creation process. OneNote allows you to create a web of as many pages as you need with zero limitations, that your team can leverage as reference material.
Building Your OneNote Wiki
The first step to creating your wiki is to establish an all-inclusive homepage. This homepage should effectively map out how the rest of your database should be constructed. The content within this database is able to be linked to other areas in the database, including other pages, specific paragraphs, and even content from an entirely different notebooks. While this could enable you to create a more complex database, for our purposes here, we’ll keep things simple with a one-layer setup.
Our hypothetical database will cover three topics, each topic split into three categories.
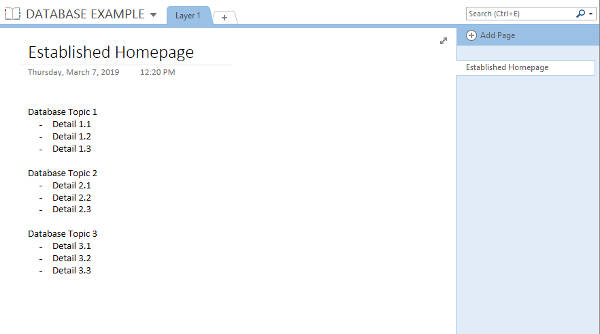
Linking Your Content
There are a few ways that you can link your wiki’s content using OneNote’s capabilities.
Linking to Pages
This process allows you to create additional pages that are pre-linked to the appropriate text on the preceding page. All you have to do is highlight the text that should link to the new page, right click on it, and select Link to Pages.
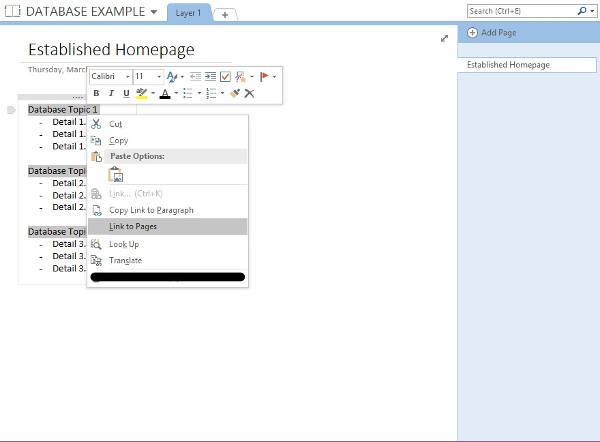
A new page will automatically be created in your notebook, accessible via the link on your homepage.
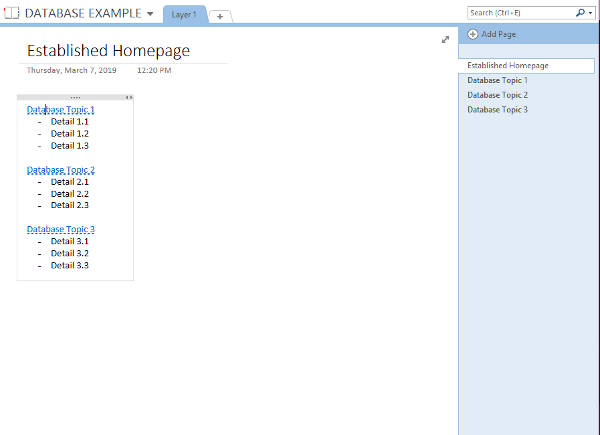
You can continue to create pages like this, diving deeper into topics and creating additional sections.
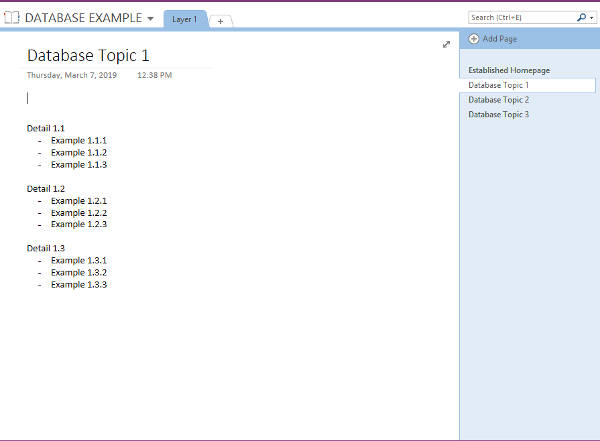
Linking to Sections
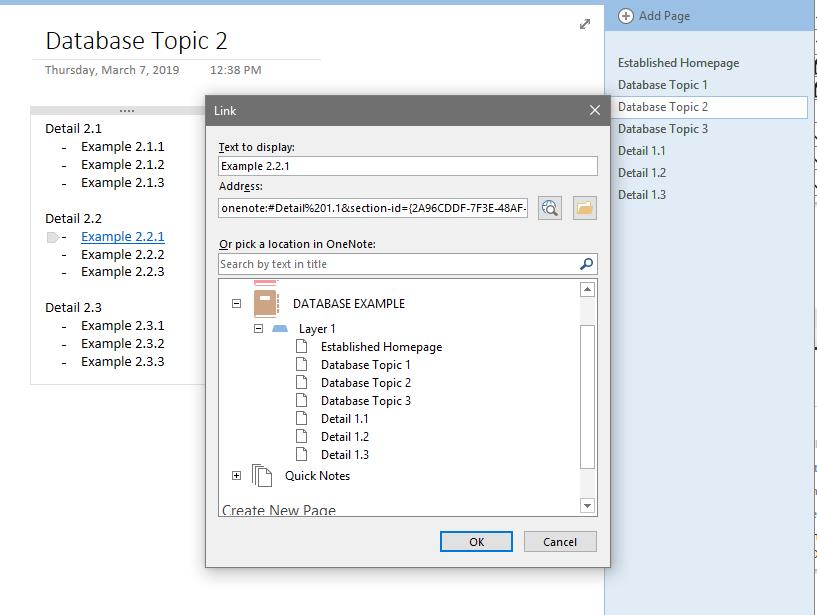
Specific sections can be linked to each other as well. Let’s say that we want to connect Example 1.1.3 and Example 2.2.1, as they discuss similar topics.
First, you’ll need to highlight the item that you want your link to send the user to. With the destination highlighted, you should have the option to Copy Link to Paragraph, which will add the link to your clipboard.
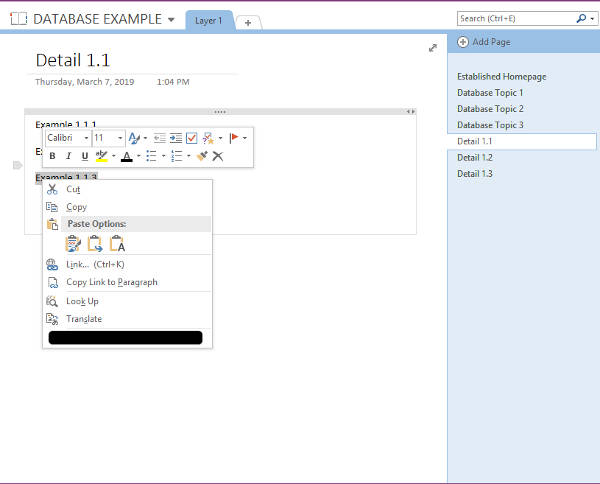
From that point, you need to navigate to the place that you want to link from. Highlighting that text, right-click and select Link. Into the Address bar, paste the link. If your database is still relatively small, you can also select the location directly from that window.
Of course, what good is a database if nobody can access it to use it? Plus, wouldn’t it be better if you had some assistance in tackling such a big project?
That’s another reason that OneNote is great - it’s very easy to collaborate with others. To invite other users to help, click File, select Share, and make the proper selections. You can also just share your database to a shared part of your network, which also enables others to access it.
That’s the long and the short of it. With a bit of time, this process can ultimately result in a fairly workable internal knowledge base for your employees to leverage.
What other uses have you found for OneNote? What features have you used that we didn’t mention? Let us know in the comments, and subscribe to our blog!


Comments